Thursday, July 3, 2014

Back in Action--A Grand New View

It has been a while--almost a year, in fact.  Last year we started our journey of redoing our first "together" home. We knocked project after project off the list to get it in tip top shape and ended our posts 9 months ago with a big announcement. 

Well, let's be honest. Seven days after we announced our big news, we lost our sweet baby. Just like that. The excitement to blog and share our adventures went to the wayside and we  went into survival mode as we were determined to stay strong in The Lord, but still very much grieving. 

Not anymore, my friends. I am officially marking this post a "get back on your horse" post and it is time to share again! 

In the past 9 months we haven't completely stopped our projects, but we stopped sharing the adventures of them (minus the Facebook and Instagram pictures, of course). So let's recap some of the things we have done since I last posted so I have some accountability in sharing them all with you. :) 
1. Dawson's mini kitchen redo
2. Paint Dawson's bathroom vanity
3. Add knobs to master bath vanity
4. Farmhouse table addition/redo
5. Patio table fix
6. Glass block bannister tear-out

Most exciting project? By far it has to be the glass blocks! No better place to pick back up! 


When we moved in, you may remember this view of our new living room/kitchen. High ceilings and an almost clear view into each room had each of us excited--we were very much separated from one another in our previous home, so the open concept was a gem! However, I couldn't get past the glass blocks. The previous homeowners listed them as a "selling feature", but I couldn't help but think of them as a "reason one might put the house one the market". ;) I loathed them. Not only were they terribly 90's, but they blocked the view into the kitchen  and/or living room and kept me from seeing my people in the other room! And who puts up a glass block BANNISTER?!  Had to go. 

Well, this week, we finally marked it off our list! 

Here is the view we had just prior toblasting  through them. We have finished painting our living space with our neutral greige and decorating with some of the things we brought with us, but the darn glass block stood in our way. We started by removing the furniture in the area (and the dogs--they didn't much like the shards of glass flying their way) and laying a large tarp down on the living room carpet knowing that we may have a large mess on our hands. 

Step 2 was to tape off the glass blocks. You know, to keep glass shards in a central location. :) The picture you see below is after Tyler took a hammer to each glass block individually and we put most of the peices in a bucket to take to the trash. What's left is the back of the wall on the kitchen side that he carefully ripped out. Most of the peices stayed together with the help of some handy duct tape, so we kept on with that method in the other 2 sections of the bannister. 

Once we removed the glass block in section one, it looked like this: 

Note: all of this was done during nap time. I have no idea how Dawson slept through it because it was LOUD! However, good thing because it was a little messy even still. I think I vacuumed 5 times in the 2 days we worked just to get all the little peices. 

Section two came out a bit easier. We knew what we were doing and found out that we could break the glass blocks along the perimeter and simply push the middle section out by hand. 

We were so excited to find out that the glass blocks sat comfortably withing the bannister railings that were already painted white and remained in fantastic condition when we removed the blocks! We had feared that we  would need to redo the entire railing or have to take time to fix the area near the floor where tile and hardwood didn't go all he way underneath. The railings could stay! 

After our third section, we had a completely open area to work with. And it was AHHH-MAZING! 

So the next dilemma...what do we put in there instead of glass blocks? Well, our original choice was to do a modern cable system but we quickly realized that price was a big reason that would NOT be happening. Who would have thought it would be 3x more expensive than spindles?! Obviously not us. Another option was black iron spindles--but they were not quite the right size and would take some serious cutting down to size to fit in our pre-made bannister. Wood spindles it is! Great price, they fit our style just fine, and they would be an easy install for us "first timers". SOLD. 


In order to make spindles happen, we need to mark our spacing and drill holes for the dowels that are on the bottom of the spindles. A little more mess, but still pretty straightforward. :) 
 
At this point, I could hardly contain myself, but daylight hours had gone away and my dear husband who was very much doing most of the work was pooped. Another day to finish. 


After church the next day, we set back to work. And completed the job. (Well mostly. We still need to caulk and fill nail holes and do some touch-up painting). That will come. Right now, all I can do is sit and stare at our handiwork. The blissful new view into our kitchen/living room. The openness this room should have had all along. I. Am. In. Love. :) 


It has come a long way, my friends. I am pleased. :)

Have you been tackling any projects on your lists? Do you have something like the glass block that needs to go, but seems daunting? :) 

Thursday, October 24, 2013

Another Transformation Forecasted

The joy of redoing our new home has been in the amount of space we have been blessed to use to welcome others. We have been working hard the past 6 months to make our living spaces speak of us...and help us tell our story. Many of you have been so gracious to me, letting me know that you so enjoy reading about our adventures and getting fun new ideas that I very well may have stolen from more experienced bloggers. ;) I have to say, I am truly blessed by your comments and encouragement to keep doing what I love. 

And that I will. One room or project at a time. 

It's the next big project that Dawson is most excited to tell you all about...


Any guess which room might be next on my list? :) 

You guessed it! The playroom will soon become a nursery and Dawson will enjoy a grand new Big Girl room! 

Baby Stricklin #2 is set to arrive in late May/early June and we could not be more excited for Dawson to become a BIG SISTER! 
I would say she's a bit excited as well. :) 

This exciting news came to us a few weeks ago, but we waited ever so patiently to tell the world because this time around it was important to us to tell family in person. This meant the long wait for family birthday celebrations to come our way so that our people would be oh so surprised. SURPRISE!! 

Well everyone, the family now knows, so you can as well. Be excited, friends...be very excited. :) 

Yay for babies! 

Sunday, October 13, 2013

Master Bathtastic

It has been a short while since my last update--one reason because we have been simply enjoying some family time and the projects are at a minimum while we plan for our "next steps" here at the house, while the other is simply because I started a post only to lose it halfway through. I'm pretty sure most of us have had that happen to us, so you know how frustrating that can be. I had to take a couple days to "recoup" after that trauma. ;)

Back in action, I figured we should take a look at the master bath, as we did a few simple fixes with the paint brush that made a world of difference. If you remember, our bathroom before had white walls and the same rosey cabinetry that the kitchen wore so well (ok, NOT to well). 

If you know me and white walls, you know that we don't get along, so the first thing I did was get some paint up on the walls. Since we had just painted the master bedroom it's deep navy, I wanted the bathroom to compliment it nicely--so I contemplated a lighter blue tone or a nice light grey. 

Let's just say I went the light blue route, quickly realized my mistake and immediately painted over it in a light grey. Against the navy bedroom, the blue looked periwinkle and reminded me of a daycare. 


Now, it may not look that bad in this photo, but in all honesty, it made me cringe and had to go. See the black vanity? We will get there in a moment :)

The grey was so much better once it was up--very clean and "Candice Olsen-esque". 

Since the bathroom has super high, skylighted ceilings and we are yet to borrow a ladder/pick up the one my dad has on hand, the paint currently stops at the 8ft mark where the moulding it. However, the plan is to bring the eye on up and do something fun in the niche above the shower (yet to be determined...ideas are welcome). 


Now, let's talk vanity. 90s rose colored wood, simply had to go. See ya! Glancing at the before photo once more, you can see this hue in its full glory, but next to the finished product, there simply is no comparison. 

In order to get this done, I gave the vanity a light sanding, wiped it free of dust, and set to painting with a glossy black paint and primer in one. The most important thing to note is not to skip the sanding, as the paint has to grip the roughed up wood in order to adhere. Skip the sanding and you end up with chips and peeling paint just days after your hard work concludes. 

Now that the vanity has been painted, the bathroom looks much richer--and I am more than pleased with the black contrast to the room's white trim and light grey walls. We added in some black frames and accessories, plan to frame out the mirror in black trim, and possibly add some storage between the double sinks to separate the mirror...all tying in the "new" vanity. It also needs some knobs which will be added very soon. 


As always, it helps to look at the before and after side-by-side, yet this always gives me more ideas for changes I hope for as we make our mark on the Northpoint house. :) 

Updates in the future: 
-paint to the ceiling
-make the arch a focal point (TBD)
-update faucets
-knobs on vanity
-trim around the mirror
-frameless shower doors
-change out Hollywood lighting

We'll see how far we get on this list... :)

Sunday, September 29, 2013

Guest room part 2: Lessons Learned in Paint Pickin'

Oh little guest room, how I am starting to love you. :) 

If you remember, we started with dirty green walls and carpet that we quickly upgraded. 


With some elbow grease, a vision, and new bedding, I was able to change the look of this room drastically--however, that was only part one of the guest room redo. I imagine many more projects in here with a craft area instead of the office space we don't really use, and some fun artwork and painting projects. Part one concluded with a very fresh space. 


A rainy Saturday afternoon this past weekend set me back to work in this space preparing for our next undetermined overnight guests. This phase of the guest room redo meant I was ready for color in the guest bathroom! 

Well, not until I finished painting the section I left off with last time (that I didn't show you until now). Surprise! I ran out of paint! 
 Since I used leftover "Urban Sunrise" from the master bath, I ended up running out before I finished phase one. Whoops! Well, pay day happened and another gallon purchased along with the gallon I would be using in the bathroom. Phase one victory! 

The guest bathroom started as a plain white box of a room with a wood cabinet, toilet, and stand up shower. And let's just say: white is NOT our thing unless it's an accent color or bedding. 

What you see here is basically the only "before" picture I took because I was so excited to get some color on those walls. My apologies. 

When we purchased the paint color I tried my hand at color matching using a photo of the bedding I had on my phone. It was hard to see the exact colors, but I figured I could get pretty close to the teal blue in the comforter I was seeking. 

Drumroll please...
A dark teal disaster! 
This photo doesn't even do it justice, because the color I saw on the walls was much more green and very harsh. With every stroke of the paintbrush, I found myself cringing because this just wasn't what I was hoping for--and looking out at the bedspread in the guest room, it wasn't a match either. Ugh. 

It reminded me of an aquamarine children's playroom that I should be putting a vinal fish covered shower curtain in. Barf. However, I thought maybe it would grow on me overnight. And if not, I may have to head back to Lowes and see if they could mute it some for me. Well, it didn't grow on me, so after church today, Dawson and I headed back to the big blue "sto-wa" as she calls it. 

I set my paint can up on the counter and begged for some expertise and help...that's when they told me the news. Not only could they not save my awful paint choice, but they could mix me a new one and let me exchange it for no charge! Lowes, you are my hero! 

So, the pillow now matched a MUCH lighter teal with a bit of blue...and it was so. Much. Better. 

 
It looks much more green in this picture--and so very hard to tell the actual color, but with the darker first coat, it only took one coat of the new color to complete the look. 

The after is a breath of paint problem fixed fresh air. Pictures back up and in their place, and accessories mixed within, the guest bath is complete. 


May our guests feel welcome in this space as phase 2 is now complete. Phase 3 will come another day, but until then: "Welcome guests!"


Romans 12:10-13 Be devoted to one another in love. Honor one another above yourselves. Never be lacking in zeal, but keep your spiritual fervor, serving the Lord. Be joyful in hope, patient in affliction, faithful in prayer. Share with the Lord’s people who are in need. Practice hospitality

Thursday, September 26, 2013

Old family photo collage

One of the biggest reasons Tyler and I were excited to purchase a home with more space was to be able to welcome friends and family. Our smaller home couldn't fit our families and friends, and guests sharing our single bathroom created a problem. Let's be honest. We didn't try REAL hard to have people stay with us there.  However, this house already tells another story. "Come on in!"


In our short 5 months at the Northpoint house, we have been blessed to welcome parents, grandparents, extended family and many friends. Dawson is quick to make friends with our guests. :) 
We have hosted small group and dinners, and even thrown a surprise birthday party here. Our home is becoming a place for YOU as well. We are blessed. 

One of my favorite projects I have completed in this welcoming home is my family photo collage. As we seek to create our own story and have all of our loved ones near, it is important to remember our roots. What better place to have our family close than in the heart of our home? 


What did it take to get this project going? First, some legwork in locating family photos. And second, locating some mismatched picture frames to spray paint white and match. 

When I started this project in our first home, I didn't have any of the pictures you see here. However, through a few phone calls and some sweet talking, I had pictures in hand within a couple weeks. A huge thank you goes to my Grandma for sending pictures of her wedding and Grandpa in the army, as well as pictures of my great-grandparents and Grandpa growing up on the farm. Very special is also the photo of Great-grandma Grace (for whom Dawson is named) and Great-Grandpa Edward. 

Also, Aunt Janan for sending oodles of family photos that I had never seen and now have the chance to proudly display. I still chuckle looking at the pictures of my dad and how much I did look like him when I was young. The top two are favorites: my grandparents hugging while Grandpa Charlie is in his military uniform, and Grandpa Charlie looking very GQ. :) 

Finally, Tyler's mom provided photos she had of both his mom and dad's side. For the first time, I had the opportunity to "meet" Tyler's grandparents through the eyes of the camera lens. I can't help but imagine that they would be proud to be a part of our lives and displayed with love in our home alongside us. 

I still have hopes of adding some more as we go--a couple round frames and some more of The Stricklin side. This wall has plenty of space to add more of our history, but as we grow in love, may we also add more of our own story. 
 
Family Photo collage, how I love you. :) 

Tuesday, September 17, 2013

We've Got the Blues

We don't really have the blues...we are just enjoying our master bedroom all dressed in navy. 


More on that in a moment. :) 

You see, our first master bedroom wasn't much of a "master". We were more slaves to the small space, doing what we could to maximize it and make it seem bigger than the niche it really was. 


That meant light colored walls and a high hung headboard. Not my favorite, but it did the trick. If you notice in the picture above, the door jam is just on the right side...that means that was where the wall was. Shimmy around the bed and you may be able to get to the tiny closet that didn't even fit all of my stuff, let alone Tyler's. You may be able to imagine our excitement when the Northpoint house have us THIS amazingness to work with...


Not only did the bedroom seem ginormous, but it had a closet fit for a king AND a bathroom! (Insert crowds cheering wildly). :) 


This is the huge closet (maybe not spectacular by some standards, but we are still finding space within it!)

 
The bathroom has double sinks and a good sized shower (some might long for a jetted tub as well, but I think I only took a bath a couple times in the 5 years I lived in the old house and that was only because I was a whale of pregnant at the time). 

Remember this monstrosity? Imagine that shimmying past the bed in the old master! Ha! Disclaimer: I apologize for the terrible picture quality. All photos were taken on a camera phone and I don't even pretend to be a professional photographer. :)

It also has vaulted ceilings with a skylight. Why is it that I keep envisioning choirs of angels singing while I describe this room?  I might be a little excited. ;) 

Well, the week after we moved in, we gave up the box-unpacking so that we could get our room feeling a little more cozy. White walls with scuffs and dirt, weren't really helping me dream sweet dreams. I think I have issues; if it isn't clean or decorated, I truly lie awake at night decorating in my head. Too much HGTV? Quite possibly. 

I was going between two color choices for the walls--both in a deep and rich jewel tone. Why not, right? 

It really was a difficult decision. I think I asked my mom her opinion 27 times and I even asked Tyler (who is color blind and truly can't see much difference between the two) several times as well. In the end, the teal seemed like it would be more of a tough match in the art department and may be more of a fad color--so doing the whole room might be a little much. The navy, however? Classy. 

Our first step was painting the walls so we could get furniture placed. On went the navy! 


Gotta love a little "Quick! Make the bed so we can send a picture to our parents!" Kind of picture. Blue painters tape still up? Check. Ladder in the corner? Check? Bed being the only decor? Check, check! 

After a week or so, I had a chance to pull some of our stuff out of boxes and had persuaded  Tyler to hang our homemade padded headboard. We were gifted a soft and inviting rug, found a chair that happened to match PERFECTLY at a neighborhood garage sale, and set to work making it feel like home. 


All I have to say is that I love spending time in this room. I have already found it incredibly relaxing--bring me some cookies and milk to enjoy in bed, and I feel like I am on a retreat! (As I sit here in bed having just eaten Oreos while I have HGTV on in the background). Wow. 

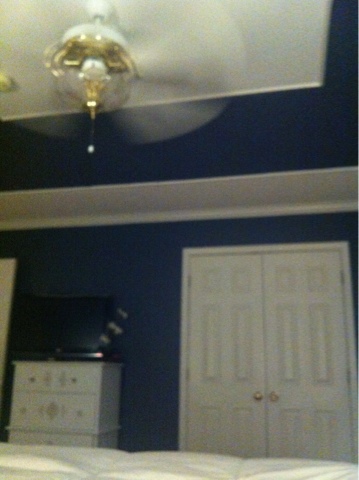
Side note: Did anyone notice the cove ceiling in some of the afters? We have painted the "sides" the same navy and plan on adding some grey to the top inset--and eventually do something with the fan. Tyler loves it...I just want a chandelier. 😄 Do they make a chandelier ceiling fan? If so...send one my way! 

So there you have it, friends. Just a little paint and a whole new room is at our fingertips. From the before...

 
...To the after.


Welcome home.